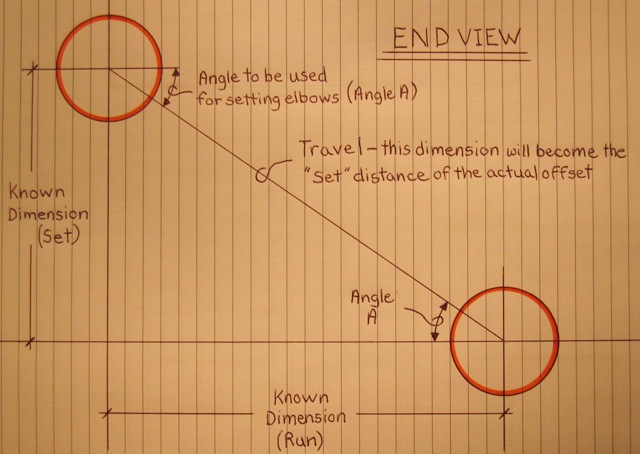
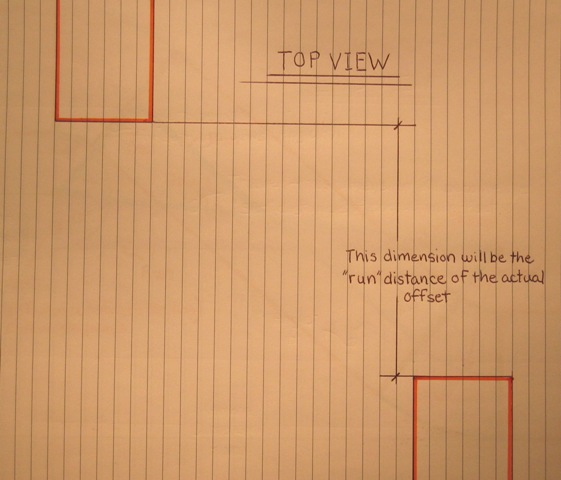
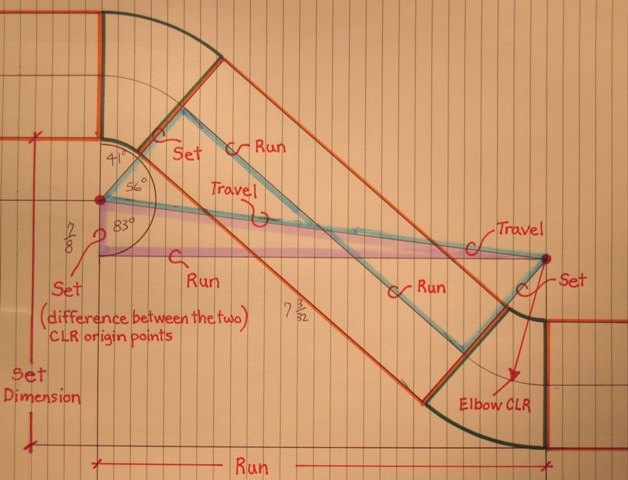
Hello folks, once again I am including a little something that was prompted by another poster here on the forum, Thomasyyk. I hadn't really worked any with this during my fabrication career so it's been good for me to take a look at it and try to understand it better. Many of the various books cover it in different ways, yet I can't say that I have been readily able to understand it through their information. So, here is my attemp at trying to provide some of you others with another way of looking at it. I have included a number of diagrams/sketches that will hopefully be of assistance to some. The first diagram shows a method of finding the "travel" portion of the offset and also gives the degree of tilt required for the two elbows involved in the fit. The second diagram gives the information for providing the run dimension for the offset. The third diagram is a bit more difficult to follow, yet it is the one that will provide the correct cut for the number of degrees required of each of the 2 elbows. It also shows how to determine the length of the straight section of pipe to connect the two elbows together to complete the offset. The travel of the first triangle that needs to be developed comes from determining the C to C distance between the starting radius point of the CLR of each of the elbows. This is represented by the purple right triangle. the SET of this is determined from the elevation differences of the two points, the Run is determined by the horizontal distance from one pipe to the other. The TRAVEL represents the actual distance from one CLR center-point to the other. Next you develop the blue triangles using half the TRAVEL of the purple triangle(this will be the TRAVEL length for the blue triangle) and the length of the CLR of the elbow(SET). By using pythagorean theorem you can determine the RUN of the blue triangle. By adding the RUN distance of the two blue triangles together you can find the length of the straight piece of pipe to connect the two elbows together this represented by the orange bordered part. In the last diagram towards the left side there is a part that looks somewhat like a protractor. This area is used to determine the angle required to determine the angle of the elbows. The angle formed by the SET and RUN of the purple triangle is added to the angle formed by the SET and RUN of the blue triangle, the product of this is subtracted from 180 to give the correct number of degrees required for the elbow. I have condensed this process a bit, hopefully those of you who look at it will understand. Best regards, Allan


